| Area: Paradise |
Hike Type: Strenuous | Pass: Natl. Park Pass |
| Distance: 9 mi RT | Duration: 8-10 hrs | Difficulty Level: Strenuous |
| Elevation Start: 5,400 | Elevation End: 10,188 | Elevation Gain: 4,788 |
| Prime Season: Mid-July – Early-Sept | Snow-Free: Final 2.2 miles are continuously covered in snow |
-
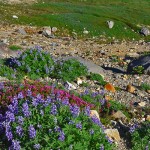
- colors of the Skyline in late August

-

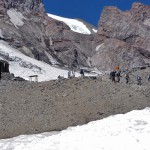
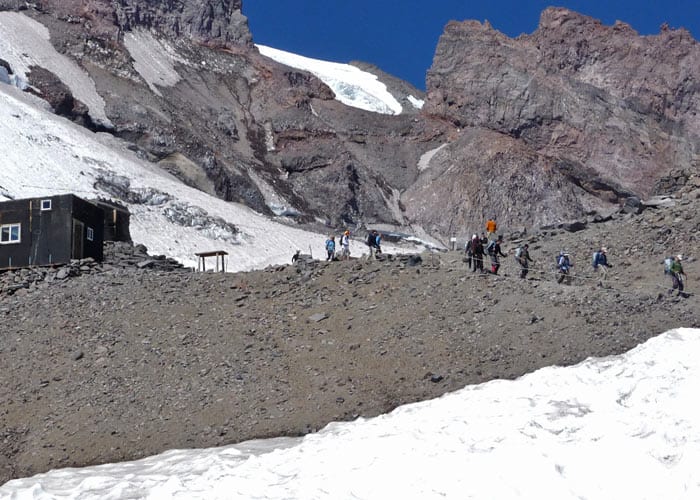
- RMI heads up to Camp Muir

-
- finally
-

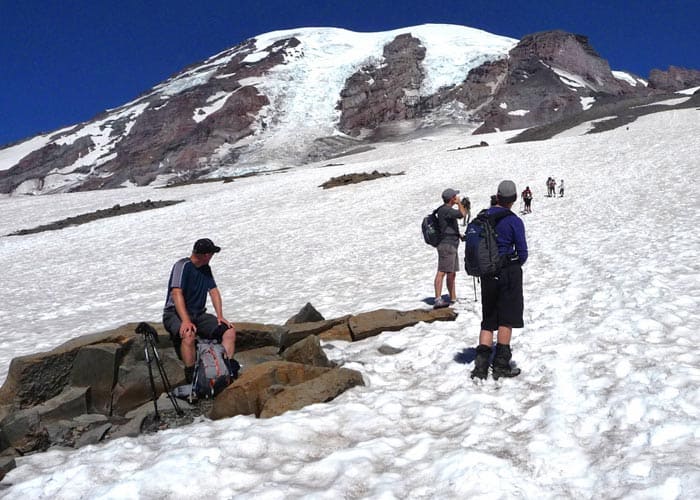
- taking a break
-
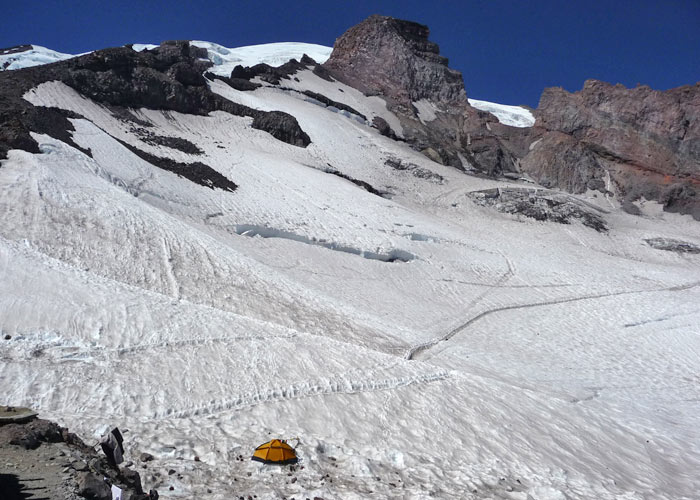
- view from the back of shelter Cowlitz Glacier
Camp Muir is at the top of many hikers’ wish list and for good reasons. It’s about as close as a hiker can get to a taste of a climbing experience; it showcases extravagant views and is one heck of a workout.
How difficult is the hike to Camp Muir?
The trek is exhilarating but is not a hike to be taken lightly. It’s tougher than it looks and the weather can change unexpectedly; it’s been said Mount Rainier makes its own weather. Conditions can change from hour to hour, from summer to winter conditions. Sudden fogs or whiteouts are not uncommon where visibility is limited or nil. This hike is only recommended for strong, experienced hikers, who are prepared with the right clothing and equipment, route-finding skills, those who know their limits and when to turn around when conditions are unfavorable. The hike to Camp Muir is the beginning of the Gibraltar Route used by climbers seeking the mountain’s summit from the south side.
Camp Muir is a climber’s camp with an impressive stone shelter, a couple of outbuildings and toilets. Camping inside the shelter is on a first-come, first-serve basis. Climbers usually hike to Camp Muir the day before they climb to rest and acclimate to the altitude, a little over 10,000 feet. If the shelter is full, climbers pitch their tents on the snow. The stone shelter is named to honor the naturalist John Muir who made an ascent of Mount Rainier in 1888. The smaller stone structure was built in 1916 and is used by professional guides.
Though this hike straddles the fine line between hiking and climbing, hikers are not required to register at the Mt. Rainier Guide House though it’s wise to stop there for information on weather and route conditions (the Guide House is above Paradise Inn). You can also pick up a handout at the Guide House that displays the landmarks of the Muir snowfield and compass bearings (true and magnetic north). This information is also available at the Henry M. Jackson Memorial Visitor Center, but the visitor center doesn’t open until 9:00 a.m. and getting an earlier start for this hike is essential.
We got our early start and were on the trail by 8 a.m. Earlier is better. We lucked out – the day we chose to hike was the last good day before the weather would deteriorate; temperatures were predicted to drop by 20 degrees the following day with a chance of precipitation. For us, the skies were blue and the mountain, beckoning.
Where to access the trail:
The hike begins on the Skyline Trail at Paradise; a scenic prelude to the high world of snow, rock and ice with views of Mount Rainier and in August, still plenty of wildflowers along the trail. The Skyline Trail was snow-free to a junction at Pebble Creek (N 46° 48′ 33″, W 121° 43′ 35″; 7,221 feet) where the route to Camp Muir begins, about 2.3 miles from Paradise. Hikers wanting an easier hike can hike to nearby Panorama Point from this junction. Here we stopped to apply sunscreen, donned hats and sunglasses for protection from the sun and glare of snow.
After crossing Pebble Creek the trail negotiates rocky outcroppings and snow patches until snow becomes continuous. Oddly enough, we noticed hummingbirds hanging around the outcroppings and as we climbed, we were accompanied by small bees, fortunately not of the stinging variety. Conditions for hiking in the snow were favorable and there was a good track to follow. We did not need traction devices though we carried them.
We kept a steady pace we could maintain without too many stops – we call it the “forever pace,” a pace that a hiker can maintain for tough hikes without hitting the wall or “bonking.” To “bonk” is an extremely unpleasant consequence of hiking too fast too quickly; we’ve experienced it in the past. You may experience an ugly medley of symptoms that include “lead legs,” nausea, excessive sweating, dizziness and/or weakness. Once a hiker “bonks” it’s hard to keep going, especially uphill.
Though the route on the snowfield has been wanded by rangers, we proceeded with caution. By September, hidden crevasses begin to open; some remain hidden under a thin blanket of snow. However, you are more apt to encounter a crevasse if you veer off the standard route and onto the Nisqually or Paradise Glaciers (this is the danger of sudden fog). Follow the established “track,” step wide of small cracks in the snow and listen for water running underneath. If you want to rest on one of the rock “islands” in the snowfield, watch out for holes that form around the rocks as snow melts.
As we climbed we noted glissade chutes. To glissade is to slide down the snow on your rear with bent knees and feet flat on the surface, preferably with the knowledge as how to do it safely, using an ice axe as a brake and knowing how to roll over into a self-arrest position should the need arise. When conditions are good, glissading can save time on the descent and it’s fun! If the snow is too soft you’ll hardly slide at all and if it’s icy you might find it hard to control your rate of speed.
We stopped frequently to eat and replenish fluids; even if you don’t feel thirsty you need to keep drinking. We drank about 3 quarts of water apiece but it’s not uncommon to drink more. Hint: if you hike long and hard and are not urinating, you are not drinking enough. Plan ahead and figure out what works best for you: I use a holster device for water so I can get to it without taking off my pack. Many hikers use hydration packs with a siphon tube. As for food – anything you like and are willing to carry! A trick we use is to suck on hard candy – that keeps the saliva flowing and also gives you a bit of energy.
About 700 feet below Muir, my partner decided he’d had enough, didn’t want to hit the wall and opted to wait as I continued. We found a good spot beside the track where he could rest, eat and drink. Though it was a warm day, he had plenty of extra clothing. Stopping was wise; once you “bonk” or “hit the wall” it’s much more difficult to hike uphill, especially in snow that was getting softer by the hour.
Many hikers agree the last 500-700 feet of the climb are the most difficult. The Muir snowfield seems to stretch on forever before you see the buildings. When you finally see Camp Muir, it looks closer than it is and it felt like I was making no progress at all as I climbed. At this point I began the rest-step (some hikers utilize “pressure” breathing but I never got the hang of that).
At last I stepped off the snow and took the last few steps to Camp Muir (10,188 feet). After lunch I lingered to take photographs (we consider a camera an essential on this hike). There’s a lot to photograph: the stone shelters, the outbuildings and the surrounding landmarks including the Cowlitz Glacier and Gibraltar Rock above Camp Muir. Be sure to take the map not only for navigation but to identify landmarks – Cadaver Gap, the Beehive, Gibraltar Rock and more.
Camp Muir was relatively quiet; a group of climbers who spoke in a foreign language and a few day-hikers milled around the shelter eating and taking photos. I wanted to linger but it was time to start down. Remember to allow time for the descent as well as the climb.
I hiked down to where my partner waited – he was feeling good so we continued down. The snow had softened enough that going down was as tiresome as climbing. The snow wasn’t soft enough to plunge-step (make our own steps) and when following other tracks we’d break out of the steps and struggled to keep our balance. We tried to glissade but the snow was too soft and we barely slid at all. Our attempts were somewhat hilarious!
It was a relief to see Pebble Creek again; while the hike to Camp Muir was astonishing and beautiful it was good to see wildflowers, trees and marmots again and especially nice to walk without struggling to stay in an upright position. – Karen Sykes, Visit Rainier Hiking Expert
What you need to take with you:
Carry the 10 Essentials and more; including personal items (extra glasses or contact lenses), emergency shelter (lightweight tarp with an emergency blanket and chemical hand/toe warmers), a complete set of dry polypropylene underwear (tops and bottoms), crampons, stabilizers and/or Yak Trax (a lightweight traction device that is helpful on ice but not so much on snow), trekking poles or ice ax. You cannot self-arrest with trekking poles as you can with an ice ax.
For additional information:
Details on fees, rules, and regulations, current conditions, weather, reserving campsites call Mount Rainier National Park (360-569-2211) or visit their website at www.nps.gov/mora. The recommended map for Mount Rainier National Park is Green Trails (Mount Rainier Wonderland Map 269S).
To get there:
From the Nisqually Entrance of the park drive to Paradise via the Nisqually-Vista Paradise road to the Henry M. Jackson Memorial Visitor Center and parking.
Do you need a permit to hike to Camp Muir?
A wilderness permit is not required to hike to Camp Muir, but it is required for overnight camping. Please Note: Those wishing to climb above 10,000 feet or onto any glaciers must pay the climbing cost recovery fee AND get a climbing permit. This includes skiers or “single push climbers”. Climbers who wish to camp overnight must also get a Wilderness Permit in order to acquire a campsite.
Waypoints
| Starting Point: 46.78627,-121.73571 | |
| Notable Waypoints:
Trailhead: N 46° 47′ 11, W 121° 44′ 09 |
|